
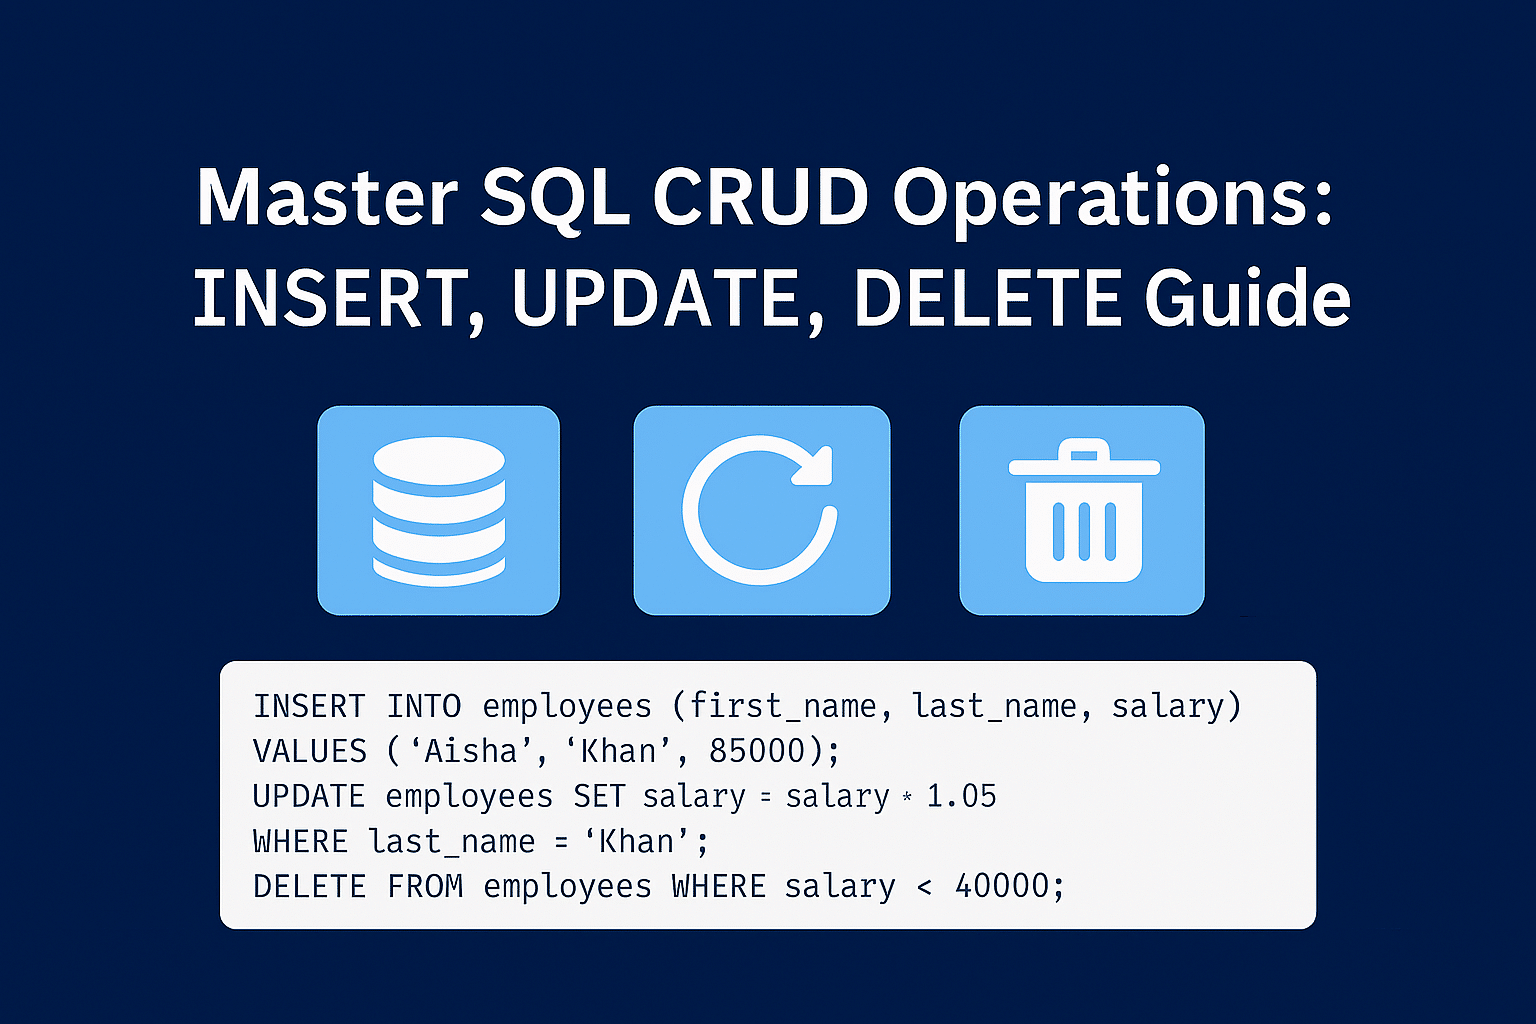
Master SQL CRUD Operations: INSERT, UPDATE, DELETE Guide
You have learned how to retrieve data from a database using SELECT statements. That is a critical first step, but it only covers reading information. To truly harness the power of SQL, you need to manage the data lifecycle—creating, updating, and deleting records. These actions are fundamental to nearly every application that interacts with a database, from e-commerce sites managing inventory to social media platforms handling user posts.
These core data manipulation tasks are often referred to by the acronym CRUD, which stands for Create, Read, Update, and Delete. In SQL, these actions correspond to specific commands:
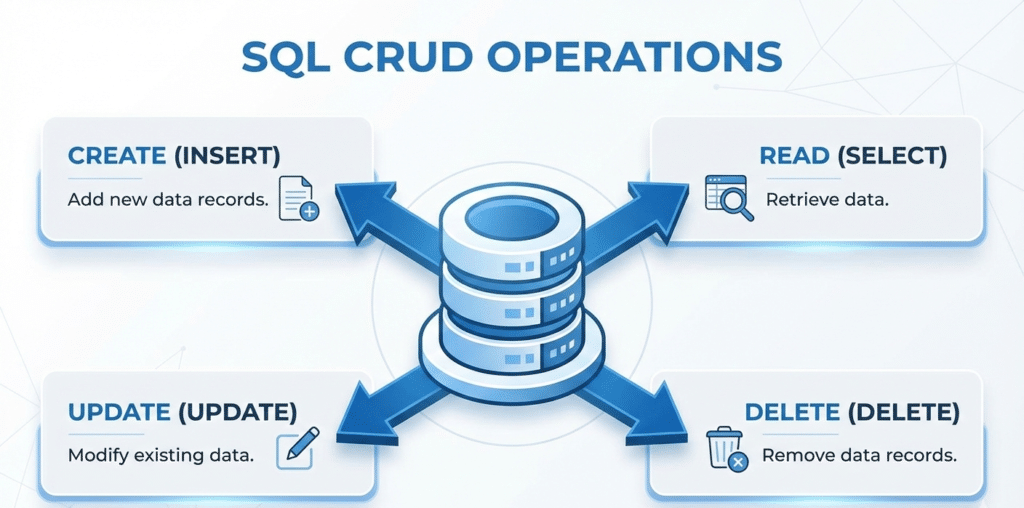
- Create →
INSERT- Read →
SELECT(which you’ve already started exploring)- Update →
UPDATE- Delete →
DELETE
This comprehensive guide will walk you through each of these essential SQL CRUD operations. We will explore the syntax, provide practical examples, and share best practices to ensure you can manipulate data confidently and safely. By the end, you’ll have a robust understanding of how to add new data, modify existing entries, and remove records with precision.
Create: Adding Data with the INSERT Command
The first step in managing data is adding it to your database. The INSERT INTO statement is used to add one or more new rows to a table. Imagine a library system; when a new book arrives, you use INSERT to add its details to your books table.
Basic Syntax of INSERT
The fundamental structure of an INSERT query requires you to specify the target table, the columns you want to populate, and the values for those columns.
INSERT INTO table_name (column1, column2, column3)
VALUES (value1, value2, value3);
Let’s break this down:
INSERT INTO table_name: This declares your intent to add data to a specific table.(column1, column2, column3): This is a list of the columns you are providing data for. The order of these columns matters.VALUES (value1, value2, value3): This clause contains the actual data you want to insert. The order of the values must correspond directly to the order of the columns listed.
SQL INSERT Example: Adding a Single Record
Let’s work with a practical example. Imagine we have a table named employees with the following structure:
| employee_id | first_name | last_name | department | salary | hire_date |
|---|---|---|---|---|---|
| INT | VARCHAR | VARCHAR | VARCHAR | DECIMAL | DATE |
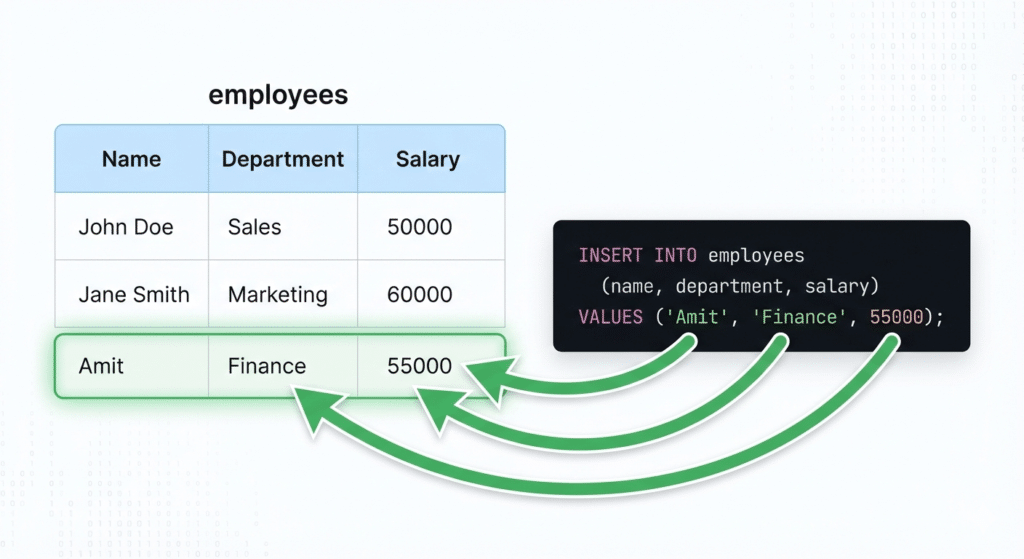
Now, let’s add a new employee, Sarah Johnson, who works in the ‘Marketing’ department with a salary of 62,000.
INSERT INTO employees (first_name, last_name, department, salary, hire_date)
VALUES ('Sarah', 'Johnson', 'Marketing', 62000.00, '2026-01-21');
After running this query, a new row is created in the employees table with the provided information. The employee_id column, if set up as an auto-incrementing primary key, would be assigned a unique ID automatically.
Inserting Data Without Specifying Columns
If you are providing a value for every column in the table in the correct order, you can omit the column list.
-- Assuming the table has columns:
employee_id, first_name, last_name, department, salary, hire_date
INSERT INTO employees<br>VALUES (101, 'Sarah', 'Johnson', 'Marketing', 62000.00, '2026-01-21');
Caution: This practice is generally discouraged. If the table structure changes (e.g., a new column is added), this query will fail. Explicitly listing the columns makes your code more readable, resilient, and less prone to errors.
Inserting Multiple Rows at Once
Constantly running single INSERT statements can be inefficient, especially when loading large amounts of data. SQL allows you to insert multiple rows with a single command, which is significantly faster because it reduces the communication overhead between your application and the database server.
The syntax involves listing multiple sets of values, separated by commas.
INSERT INTO employees (first_name, last_name, department, salary, hire_date)
VALUES ('Michael', 'Brown', 'Sales', 75000.00, '2025-11-10'),
('Jessica', 'Davis', 'Human Resources', 58000.00, '2026-01-15'),
('David', 'Wilson', 'IT', 95000.00, '2025-09-01');
This single query adds three new employees to the table, making your data-loading process much more efficient.
Update: Modifying Existing Data with UPDATE
Data is rarely static. Employees get promotions, product prices change, and customer addresses need updating. The UPDATE statement is used to modify existing records in a table. It is arguably one of the most powerful and potentially dangerous commands in SQL if used incorrectly.
The Critical UPDATE Syntax
The structure of an UPDATE statement involves specifying the table, the columns to change, their new values, and—most importantly—the condition that identifies which rows to update.
UPDATE table_name
SET column1 = new_value1,
column2 = new_value2
WHERE condition;
UPDATE table_name: Specifies the table you want to modify.SET column1 = new_value1: Assigns a new value to a specific column. You can update multiple columns by separating each assignment with a comma.WHERE condition: This clause filters the rows to be updated. For example,WHERE employee_id = 101.
The Golden Rule of UPDATE: Always Use WHERE
A WHERE clause is absolutely essential for a targeted UPDATE. If you omit the WHERE clause, the UPDATE statement will be applied to every single row in the table.
Imagine running this query on a table with thousands of employees:
-- DANGEROUS: DO NOT RUN WITHOUT A WHERE CLAUSE
UPDATE employees
SET salary = 50000.00;
This command would set the salary of every employee to 50,000, likely causing a data disaster that is difficult to reverse.
SQL UPDATE Syntax Examples
Let’s look at some safe and practical UPDATE scenarios.
Example 1: Updating a Single Column for a Single Record
Sarah Johnson (employee_id = 101) has received a raise. Let’s update her salary to 65,000.
UPDATE employees
SET salary = 65000.00
WHERE employee_id = 101;
Example 2: Updating Multiple Columns
Michael Brown from the Sales team is moving to the Marketing department and getting a salary adjustment.
UPDATE employees
SET department = 'Marketing',
salary = 78000.00
WHERE first_name = 'Michael' AND last_name = 'Brown';
Example 3: Updating Multiple Rows Based on a Condition
The company has decided to give a 5% raise to all employees in the IT department.
UPDATE employees
SET salary = salary * 1.05
WHERE department = 'IT';
In this example, we use the existing value of the salary column in a calculation to determine its new value. This is a common pattern for applying bulk changes.
Delete: Removing Data with DELETE
Just as you need to add and update data, you also need to remove it. An employee might leave the company, a product might be discontinued, or a test record might need to be cleaned up. The DELETE command is used to remove one or more rows from a table.
Like UPDATE, the DELETE command is powerful and requires careful handling to avoid accidental data loss.
The DELETE Command Syntax
The syntax for DELETE is simpler than UPDATE but follows the same critical principle of using a WHERE clause.
DELETE FROM table_name
WHERE condition;
DELETE FROM table_name: Specifies the table from which you want to remove rows.WHERE condition: Filters which rows should be deleted.
The Danger of a DELETE Without WHERE
Similar to UPDATE, omitting the WHERE clause from a DELETE statement has catastrophic consequences.
-- DANGEROUS: THIS DELETES ALL DATA FROM THE TABLE
DELETE FROM employees;
Running this query will permanently erase all rows from the employees table. The table structure itself will remain, but it will be empty. Always double-check for a WHERE clause before executing a DELETE command.
SQL DELETE Command Examples
Here are some examples of using DELETE safely.
Example 1: Deleting a Specific Record
An employee, Jessica Davis, has left the company. We need to remove her record using her unique employee_id.
DELETE FROM employees
WHERE employee_id = 102;
Example 2: Deleting Multiple Records Based on a Condition
Let’s say we need to remove all records for temporary contractors hired before 2024. Assuming we have a status column:
DELETE FROM employees
WHERE status = 'Contractor' AND hire_date < '2024-01-01';
This will find all rows matching both conditions and remove them.
Safe SQL Practices: The “Select Before You Act” Rule
A crucial best practice for both UPDATE and DELETE is to preview the rows you intend to modify before you commit the change. You can do this by writing a SELECT statement with the exact same WHERE clause first.
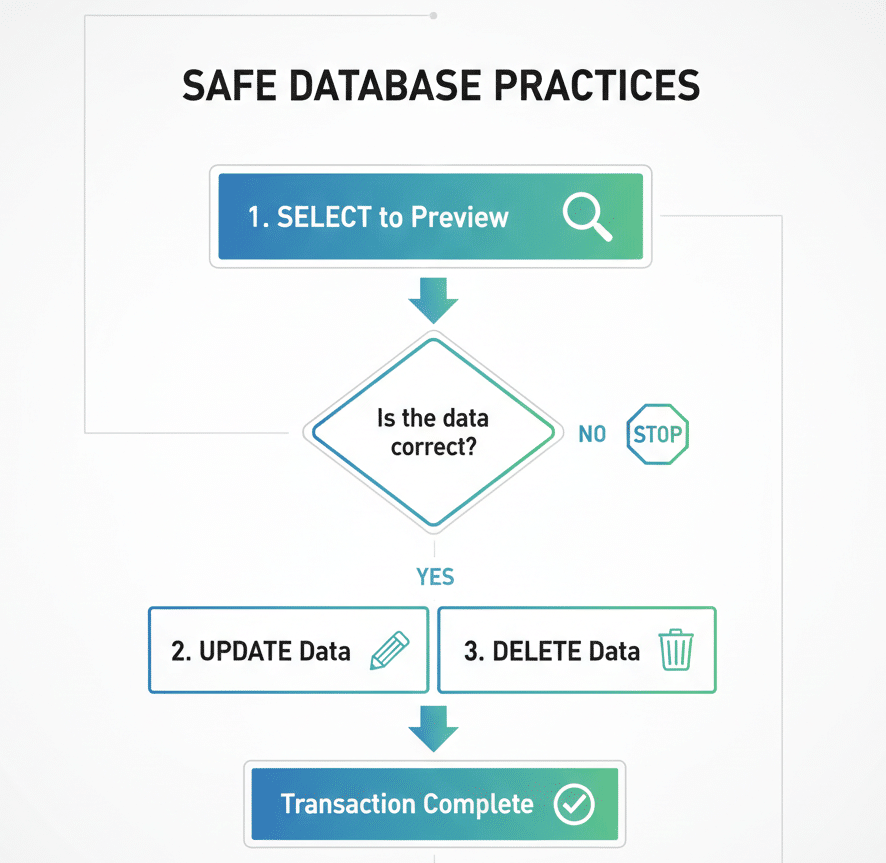
- Write the
SELECTquery: Before deleting contractors hired before 2024, run this:SELECT * FROM employees
WHERE status = ‘Contractor’ AND hire_date < ‘2024-01-01’;- Verify the Results: Examine the output. Are these the exact rows you want to delete? If yes, proceed. If not, refine your
WHEREclause until it correctly targets only the intended data.- Execute the
DELETEorUPDATE: Once you are confident in yourWHEREclause, you can proceed with the actual data manipulation command.DELETE FROM employees
WHERE status = ‘Contractor’ AND hire_date < ‘2024-01-01’;
This two-step process acts as a crucial safety check and has saved countless developers from making irreversible mistakes.
DELETE vs. TRUNCATE: What’s the Difference?
You may also encounter the TRUNCATE command. Both DELETE FROM table_name; and TRUNCATE TABLE table_name; will empty a table of all its data, but they work very differently.
DELETE: This is a Data Manipulation Language (DML) command. It removes rows one by one and records an entry in the transaction log for each deleted row. This means the operation can be rolled back. It also does not reset auto-incrementing identity columns.TRUNCATE: This is a Data Definition Language (DDL) command. It deallocates the data pages of the table, which is much faster thanDELETEfor large tables. It typically cannot be rolled back and resets any identity counters. You also cannot use aWHEREclause withTRUNCATE.
For beginners, it’s best to stick with DELETE. It is safer and more flexible.
NULL: The Concept of “Nothing”
In the world of databases, there is a special value used to represent missing or unknown information: NULL. It is crucial to understand that NULL is not the same as zero (0), an empty string (''), or a space (' '). NULL simply means “no value exists.”
For example:
- An employee who hasn’t been assigned to a department yet would have
NULLin thedepartmentcolumn.- A customer who declined to provide a phone number would have
NULLin thephone_numberfield.
Handling NULL in SQL Queries
Because NULL is not a value but a state, you cannot use standard comparison operators like = or != to check for it.
Incorrect way:
-- This will not work as expected
SELECT * FROM employees WHERE department = NULL;
This query will return no rows, even if there are employees with a NULL department, because nothing is ever “equal” to NULL, not even NULL itself.
Correct way:
To check for NULL values, you must use the IS NULL operator.
-- Find all employees not assigned to a department
SELECT first_name, last_name FROM employees
WHERE department IS NULL;
Similarly, to find rows where a value is present, you use the IS NOT NULL operator.
-- Find all employees who have been assigned a department
SELECT first_name, last_name, department FROM employees
WHERE department IS NOT NULL;
Understanding how to properly filter for NULL is essential for accurate data retrieval and analysis. It’s a common stumbling block for newcomers, but mastering IS NULL and IS NOT NULL will make your queries much more reliable.
Conclusion: You Are in Control of the Data
You have now explored the complete set of SQL CRUD operations: INSERT, UPDATE, and DELETE. These commands are the building blocks of data management and are used every day in real-world applications.
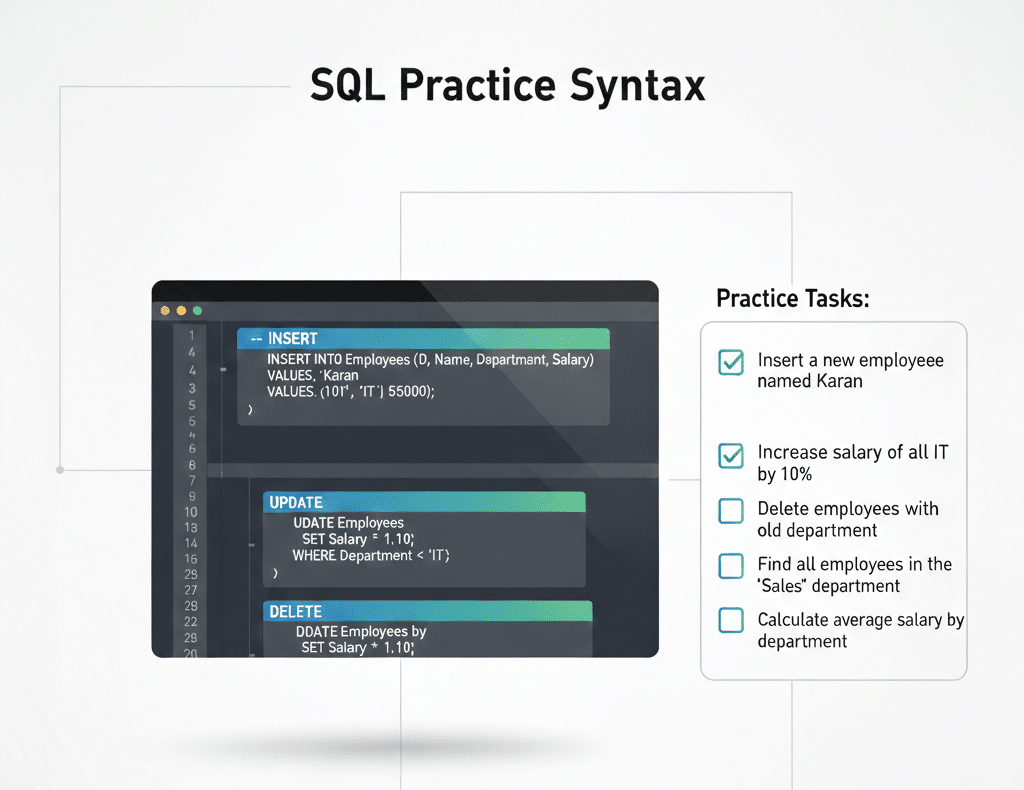
Here’s a summary of what you’ve learned:
INSERT: How to add single or multiple rows of new data into a table.UPDATE: How to modify existing data in a targeted way, with a strong emphasis on the importance of theWHEREclause.DELETE: How to safely remove records and the critical difference between a targetedDELETEand an empty-table command.NULLValues: The concept ofNULLas “missing information” and the correct way to query for it usingIS NULLandIS NOT NULL.- Safe Practices: The vital “select before you act” method to prevent accidental data loss when using
UPDATEorDELETE.
With these skills, you have moved beyond simply reading data and can now actively manage it. Remember that with great power comes great responsibility. Always be mindful, test your WHERE clauses, and think through the impact of every UPDATE and DELETE command you write.
The next logical step in your SQL journey is to learn how different tables relate to each other. Understanding JOINs will allow you to combine data from multiple tables, unlocking even more powerful data insights.
👉 What’s Next?
Now that you can create and modify data, it’s time to learn how tables connect to each other.
Next Topic:
Joins & Relationships
👉 Continue to Intermediate SQL → Joins & Relationships
📩 Bonus Resource
👉 Download SQL CRUD Practice Sheet
👉 Get weekly SQL challenges for beginners
🎯 Final Tip
SQL gives you power over data.
With great power comes responsibility — always use WHERE.
You’re officially moving beyond beginner level 🚀
👉 Continue to Joins & Relationships →